Last update: April 2017
![]()
|
Last update: April 2017 |
|
Localizing bilingual XLIFF files involves the translation of the files' <target> text elements and changing/updating their translation status attributes ("state").
See also: "Introduction to XLIFF."
XLIFF 2.0 is the file format of the "QuickShip exchange" files, a quick and easy way of exchanging translation data with translators and translation agencies A compact version of the RC-WinTrans localization environment ("QuickShip Edition") is available for free to accommodate translation of this file type.
NOTE: XLIFF 1.0 files are not supported. However, an XLIFF 1.0 file may be used by changing its version number (in the file) to 1.1.
Target text can be imported from an XLIFF file at any time by using the Import | Existing Translated
See also: "Import from Translated Resource File."
Automatic Import When Adding a File to a Translation Project When adding an XLIFF file to a translation project the target text is carried over to the project database (and shown in the Text Table view's "Target" column) only when the project's active target language is the same as the target language specified in the "target-language" XLIFF file attribute. If the project's active target language is different then the target text column will remain empty (all elements must be translated).
The XLIFF "state" attribute value is automatically set by RC-WinTrans whenever a target text is edited. An item's state can be set manually in the Text Table view's "State" column (Figure 1) or by using the State Flag commands from the Edit menu or Item State toolbar.
See also: "Setting Item Attributes and State Flags."
Statistics RC-WinTrans calculates the translation status for a file or project ("translated" or "not translated") based on the state flags that have been set:
Translation calculation and indication in RC-WinTrans occurs in the following views/displays:
"Changed Source" State In addition to the standard XLIFF state values, RC-WinTrans defines a "changed source" state used to indicate that a translation unit has already been translated but the original text in the source file has been modified. The underlying attribute value used in the XLIFF file is "x-change."
Color-Coded State Indication The colors used in the Text Table view to indicate a certain state can be determined in the Options dialog box. |
|
Figure 1: The "State" column in RC-WinTrans' Text Table view. Select the state to activate a combo box containing the various item state options. |
Display The <note> element text is displayed in the following RC-WinTrans views:
Editing The <note> element text can be edited in the following RC-WinTrans views:
For XLIFF files RC-WinTrans reads all of the "<note>" elements belonging to the item as one note.
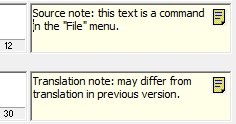
XLIFF 2.0: The text of all "<note>" elements with the attribute "<note appliesTo="source">" are taken as notes for the source text. A note defined for the target text ("<note appliesTo=target">) is taken as the note for the translation text.
See also: "Notes";
|
|
Figure 2: The Note fields in the Translation Edit bar- one for the source text (top) and one for the target text (bottom). |
Figure 3: Notes indication in the Text Table view. |
|